After The Previous Drain Is Eliminated
페이지 정보

본문
Apply plumber’s putty to the underside of the drain flange to create a watertight seal. Insert the drain flange into the sink’s drain gap and press it firmly into place. From under the sink, slide the rubber gasket after which the metal friction ring onto the drain flange. Lastly, screw the locknut onto the drain flange till it’s hand tight. Once the drain is prepared, connect the drain pipe. Apply Teflon tape to the threads on the pipe to create a tight seal. Insert the pipe into the drain outlet on the sink and tighten the slip nut till it’s snug. If your sink has a rubbish disposal, connect the disposal drain pipe to the aspect of the drain pipe utilizing a slip nut and washer.
Apply a bead of clear silicone caulk to the underside of the vessel. Place it over the opening on the vanity high. Then assemble the drain, but don’t overtighten. Some vessel sinks don’t have a flat backside surface, in order that they will require a mounting ring to carry the bowl. Apply silicone sealant to the ring and place it over the vanity prime gap. Apply sealant to the highest of the ring and set the bowl in place. Some mounting rings require bolts to hold it in place. In conclusion, if going via the ground is just not an choice for plumbing a kitchen sink drain, there are various methods and techniques accessible. Venting via the wall or using an air admittance valve are two common alternate options that can be thought-about. It is essential to observe correct installation procedures and adhere to local building codes and regulations to ensure a protected and effective plumbing system. Stage II. Stools inserted and pinned to the soffit of brickwork over the opening. Stage II. Brickwork between pined instruments removed to go away wall supported on pined stools. Stage IV. Reinforcement fabricated and placed around pinned stools. Stage V. Formwork erected and beam solid. Stage VI. Formwork eliminated, beam allowed to cure before being pinned to the underside of the wall.
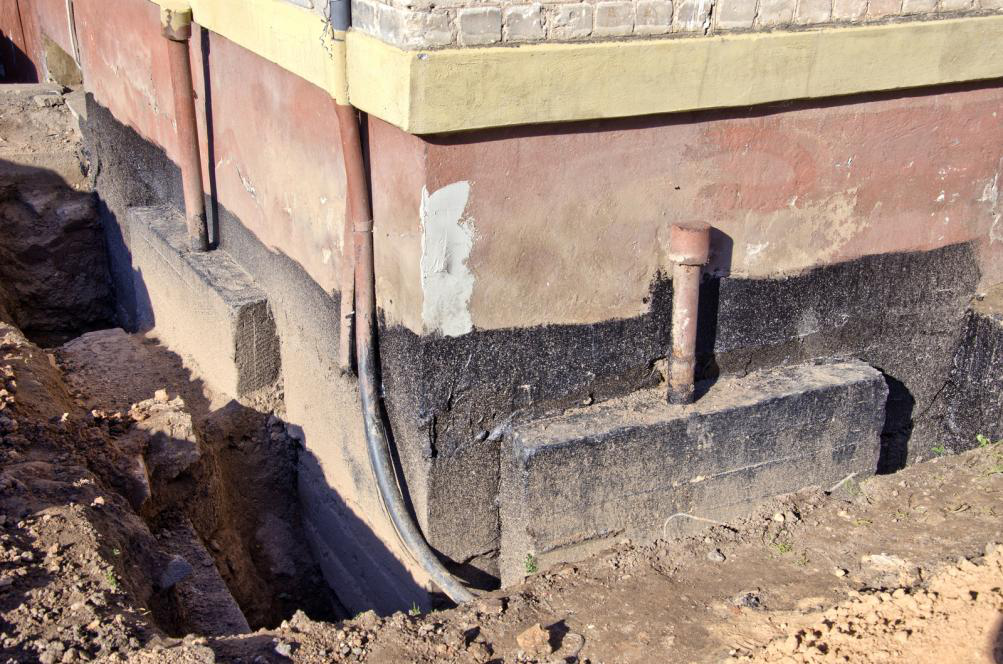
Basis mastic regularly deteriorates, due to the elements and seasonal modifications. If roofing tar is used, it's going to degrade sooner because this materials wasn’t designed for beneath floor software. Even when the mastic holds up nicely over time, it'll start to leak if a crack types within the basement wall. Or they is perhaps constructed to channel water via a vertical drainpipe alongside the foundation wall to the footing drain system and sump pump. However the huge amounts of water flowing off a roof can simply overwhelm such techniques. The most effective resolution here is to equip downspouts with lengthy horizontal extensions that channel roof water away from the inspiration and into an area of the yard the place the water is absorbed or directed away from the home.
Keep this in thoughts if there are intense temperature fluctuations in your space. While foundation cracks can result in water leaks, they may also be brought on by them. For those with leak issues, sealing the foundation is a must. Check for pooling water or water damage each indoors and outdoors when performing a basis inspection, too. Nobody likes finding a leak in their basement. It’s a universally unpleasant discovery. Actually, there’s only one factor that makes it worse: you find the leak by stepping in it whereas sporting socks. There’s something deeply unsettling about soggy wet fabric caught to your ft — it prompts the bravest of us to curl our toes and rip off our socks with disgust. As soon as you’ve removed your soggy footwear and taken a superb take a look at your wet basement, you assume to your self, "now what? Position the vanity in order that the holes on the again aspect fit over the pipes within the wall. Then check that it's stage. Use shims to regulate. Some vanities have adjustable toes to assist with leveling. Drill pilot holes by the vanity again into the studs, and safe the vanity to the wall with screws. In case you can’t line up the holes with studs, use wall anchors in your wall sort. Find out how to make use of drywall anchors. Learn to drill by way of tile. Attach the faucet on the vanity top earlier than installing the highest on the vanity.